
As you may already know, Artofmanliness.com just published an article that I wrote titled HOW TO BUILD A SMALL GAME SURVIVAL SNARE. This is a very thorough article about my favorite small game snare set – the Trigger Spring Snare. If you haven’t already read it, click on the link below to see it. It has many excellent photos that detail a variety of ways to make an incredibly effective Survival Snare.
http://artofmanliness.com/2012/03/29/how-to-build-a-small-game-survival-snare/
I conclude the fore-mentioned article by suggesting that it’s a good idea to keep a handful of pre-made wire snares in your survival pack or Bug Out Bag just in case you may ever be faced with a need to trap wild game for food. You just never know…
In this article I will show you how I make my pre-made wire noose snare sets. Many people make these different ways but at the end of the day, all designs are pretty similar. For just a few $$$ you can buy enough supplies to make 10 + pre-made wire snares to stow away in your survival packs and kits.
You only need 2 items to start making snares. Both can be picked up at pretty much any local hardware store. The first item is wire. I prefer #2 picture hanging wire. It consists of 12ish small wires twisted into 1 thin cable.

You will also need some little fasteners called “Cable Ferrules”. They will be located in the Small Parts bins in most hardware stores with all the random little nuts, bolts, etc… I think these I purchased for just .29 cents each.

Make sure they are sized appropriately for the #2 wire – not too big and not too small. These are to clamp and secure the loop holes at each end of your snare wire.
Now, let’s make some snares.
The first step is to cut a few lengths of wire. I normally cut 36″ pieces but it’s a good idea to cut a variety of different snare lengths ranging from 24″ to 36″. I use the wire cutters on my Leatherman MUT.

The next step is to create a loop a little larger than the diameter of a pencil by feeding one end of a piece of wire in and back through the cable ferrule.

Now, crimp it down using the wire cutters – not too hard – you don’t want to cut through it – you just want to crimp it tight on the wire inside.

Then, wrap the little tail around the main leg to finish it off cleanly.

Do the same thing to the other end of your piece of wire.
NOTE: Make sure you can thread one loop end through the other loop end to make a noose. Don’t make your little loops on the ends so small that you can’t feed the other end through it to create a snare noose.
When you are finished, your pre-made snares should look something like this.

The noose can then be set across a well traveled game trail and the other end can be tied off using different cordage such as paracord to a stake or tree.

Here is a photo of the paracord tied to a nearby sapling.

Snares like this can also be placed across burrow entrances.

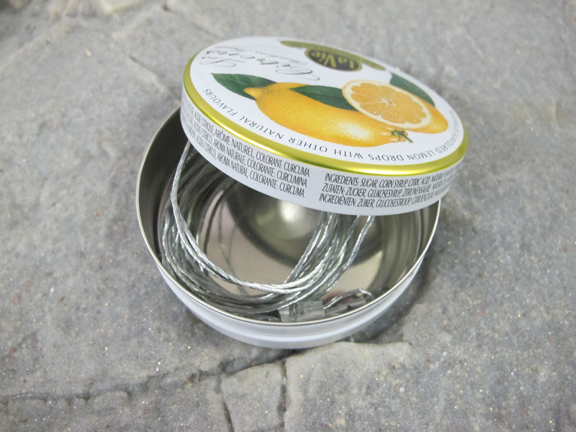
You can easily store several snares like these in a small tobacco dip can or other little container. I prefer aluminum or metal because they are multi-functional. See how I use an aluminum can to make CHAR CLOTH in THIS POST. These snares take up hardly any space and weigh virtually nothing but can be an incredibly effective hunting party when you need them to be. It’s amazing how something so small and light-weight can be so useful and effective.


To learn about how to further use and set snares like these, be sure to read my article about Survival Snares on Artofmanliness.com here:
http://artofmanliness.com/2012/03/29/how-to-build-a-small-game-survival-snare/
Remember, it’s not IF but WHEN
Creek


1 Comment