
You can learn how to build a quinzee snow shelter in 5 easy steps. This ultimate resource on how to build a winter survival shelter in the woods will teach you how to choose a location, how to size your quinzee snow shelter for camping, the steps to properly shape your quinzee and have consistent thickness, and how to carve out the inside.

Download the quinzee checklist for a handy reference to all the steps of how to build a quinzee snow shelter for winter camping!
How to build a Quinzee Snow Shelter to increase your bushcraft winter camping skills in the cold–You’re stuck outdoors in the snow. Can you Survive?
Download the quinzee checklist for a handy reference to all the steps of how to build a quinzee snow shelter for winter camping!
Do you know what a quinzee is? In any winter survival situation, there are two important things to remember. The first is that your own body heat is one of your most important assets. The second is that snow is a great insulator. A quinzee snow shelter is a great way to take advantage of both whether you are in an actual cold-weather survival scenario or just practicing your bushcraft and winter camping skills.
Are you prepared for a winter emergency?
In a winter survival scenario, your focus should be on heat, necessities like shelter and water, and boosting your chances of being found quickly. A quinzee snow shelter and heat will be your main immediate needs!
Shelter and your own body heat can make a huge difference for your winter survival. Learn to build a quinzee snow shelter in the woods to make sure you are protected from the elements until you are found. You can also use a heat source in your shelter when needed like a candle.
You can also build a quinzee snow shelter just for fun in your yard in the winter – it is a great activity, especially with kids, and will give you practice should you ever need a winter survival shelter in an emergency or that camping trip the family is looking forward to.
Here is also an article about how to find shelter in a natural TREE WELL: https://willowhavenoutdoor.com/pine-tree-winter-survival-snow-shelter-video-post/
Before you Begin: Start with a Survival “Can-Do” Mindset
In any emergency, having and maintaining control is important. You must have a positive survival mindset. With snow and sticks, you can build a winter survival shelter to protect yourself and loved ones until help can arrive. Stay calm and assess your location. Start with a visualization of how you will build your quinzee snow shelter. Your positive mindset will impact the outcome of your situation.
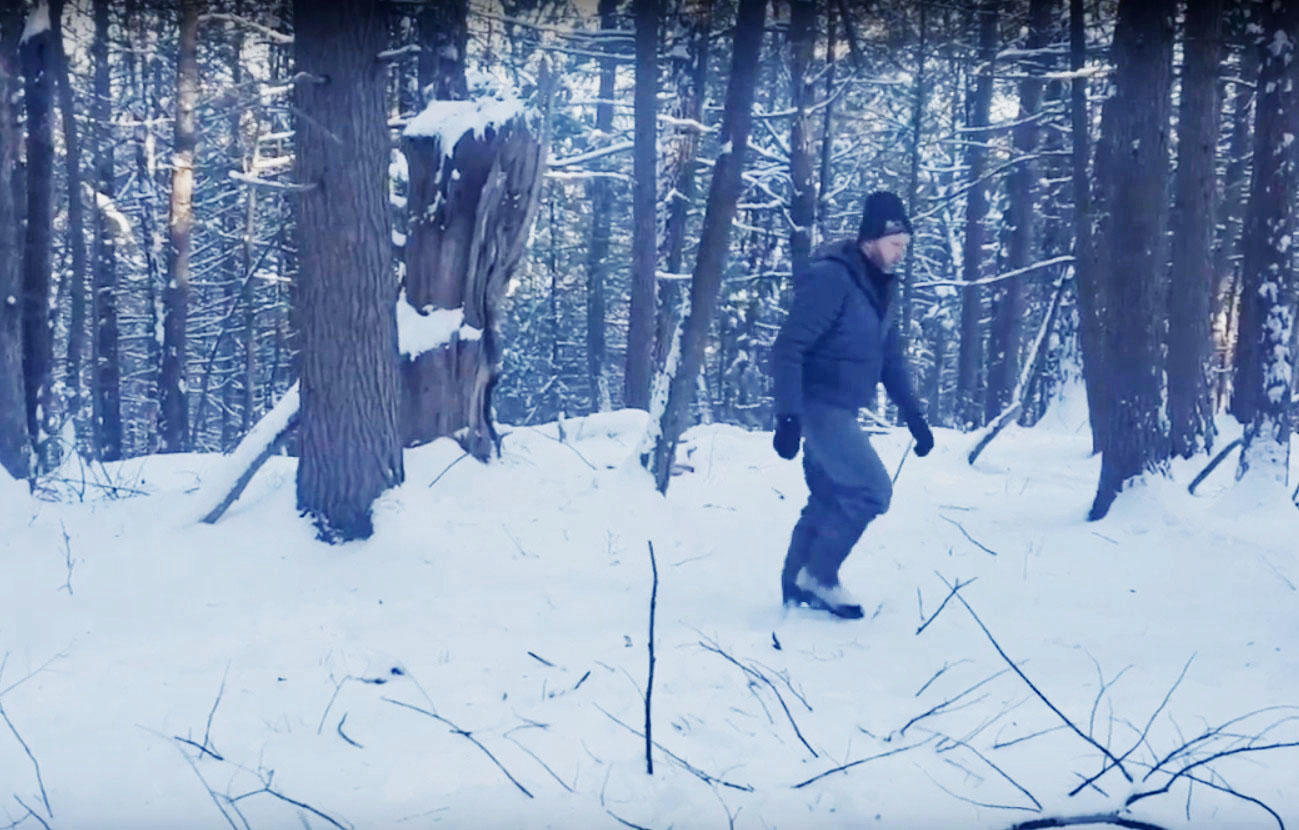
How To Build a Quinzee Snow Shelter Step #1: Location First “Look up”

The first step in how to build a shelter in the woods is to assess your location. When assessing location, there are hazards to watch out for – such as widowmakers, wind drops and snaps that can happen when a tree is dead or almost dead. You don’t want to build your quinzee in any areas where a tree snap may happen or large branches might drop. It is important to consider hazards and safety, as you don’t want to build an awesome quinzee in a bad location. Doing so would make it an unsafe shelter, and safety is paramount in the wilderness.
You should choose an area that is nice and flat. It is good if the location is a bit downhill to block the predominant wind. It’s great to have a nice canopy overhead as long as it is healthy and there are no drop hazards and plenty of shade is optimal due to melting that can happen and affect the integrity of the structure.
Pro Tips
- Watch out for hazards
- Choose a nice and flat area
- Block the predominant wind
Step #2: Sizing your quinzee snow shelter
After you have decided on the location of your quinzee winter survival shelter, the next step is to figure out the circumference or size of the quinzee. It should be a little bigger than you are, so you have the ability to lay down and sleep in it. Ideally, you want to create a round dome shape so when you carve it out, you have the same distance all around to give consistency to the walls for strength and durability.
Start in the center of where you will build your quinzee and mark the center point with a stick. If you have cord or rope with you, you can tie it to the stick and walk a circle all the way around the stick.
If you don’t have cord or rope, you’ll need to pace out your shape. To pace it out, face each direction and walk approximately a pace and a half from your center point in each direction.(depending on size you need for you or your party) After you have your four directions paced out, you can connect the outer points of them by walking it to create a full circle. This gives you a blueprint for the size of the snow mound you’ll create for your quinzee snow shelter in your camping area
Pro Tips
- Mark the center point
- If you have cord, tie it to the center point and walk a circle
- If you don’t have cord, pace out directions and connect the outer points for your circle
Download the quinzee checklist for a handy reference to all the steps of how to build a quinzee snow shelter for winter camping!
Step #3: Shaping your quinzee

After you have paced out the blueprint for your quinzee snow shelter, you need to make a big mound of snow within that blueprint. A great tip for saving time and effort is to put a bunch of gear in a mound shape in the middle of the blueprint and cover it with a tarp before you begin to pile on the snow. This way, you don’t actually have to fill that part with snow, which will make the digging it out phase much faster!.
After you have your covered gear mound in the center, you’ll begin the process of throwing up snow against the mound. You want to make sure to actually throw it, so compression happens and the snow crystals fuse together. Create staging areas around the bottom of the mound, then throw snow on top of that staging area and build it up. Make sure you build out the sides and pack them down to have a really solid foundation.
You can use a snow shovel to throw snow on your quinzee if you have one. This is a great method for the backyard! However, if you’re out in the woods, backpacking in the snow, you may not have one. In this case, you can use your snowshoes to scoop and throw snow to build your quinzee.
When building a quinzee snow shelter, it is important to have a dome shape and to take any small random sticks out of the snow as you go when throwing the snow on,you will be deliberately adding sticks later in porcupine phase. You don’t want them to harden in there, as it makes it harder to dig out when you get to that phase and they may also cause splintering – which could affect the integrity of your winter survival shelter.
Pro Tips
- A shaped, covered gear pile in the center before adding snow saves time
- Remember to throw the snow for compression
- Use a snowshoe if you don’t have a shovel
- Remember the importance of the dome shape!
Most common mistake building a winter shelter (creating a peak is dangerous)

ATTENTION:
The dome shape is important, because you don’t want a peak on top. A peak creates extra weight on top, which can be hazardous. We want everything in alignment. The quinzee snow shelter should be the same thickness all around, including the top.
Download the quinzee checklist for a handy reference to all the steps!
While building your quinzee shelter in the woods, it is also important to maintain your body temperature. You want to make sure you don’t start to sweat – building a quinzee can be quite a job! If you start to feel hot, first try taking off your hat, as most of your heat is trapped by your head, neck and core. If you’re still too hot, take off your gloves – that’s another are where you can cool down. You want to follow the No Sweat principle. If you sweat and then get in the quinzee for the night in the cold, it is going to be a very uncomfortable, even painful, night. Wet sweat and cold don’t mix very well! Maintain your body temperature, so your time in the quinzee snow shelter after it is built will be comfortable.
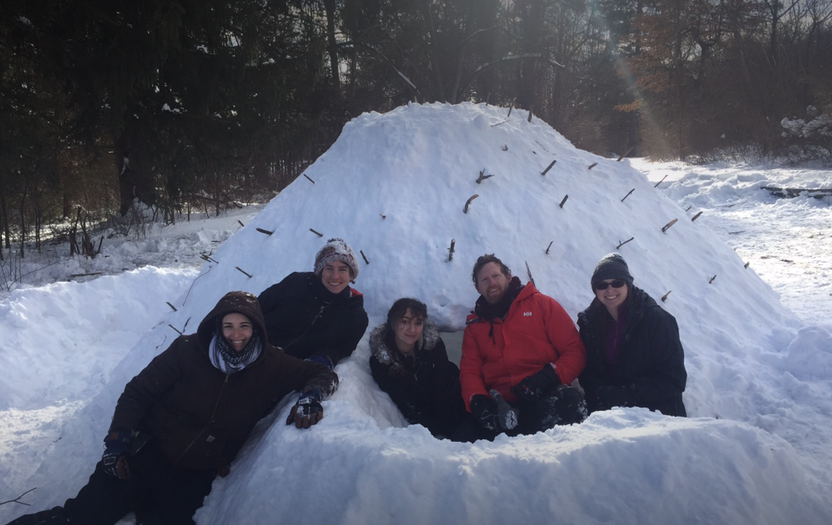
After you have plenty of compacted snow in a dome shape – 6-10 feet in diameter and 5-7 feet tall – it is time to gather 12 – 18 inch sticks for the ‘porcupine’ stage of building.
Pro Tips
- Make sure you maintain your body temperature and follow the No Sweat principle
- Don’t have a peak on top of your quinzee – remember the dome shape.
A great article about building a quinzee snow shelter with kids can be found HERE.
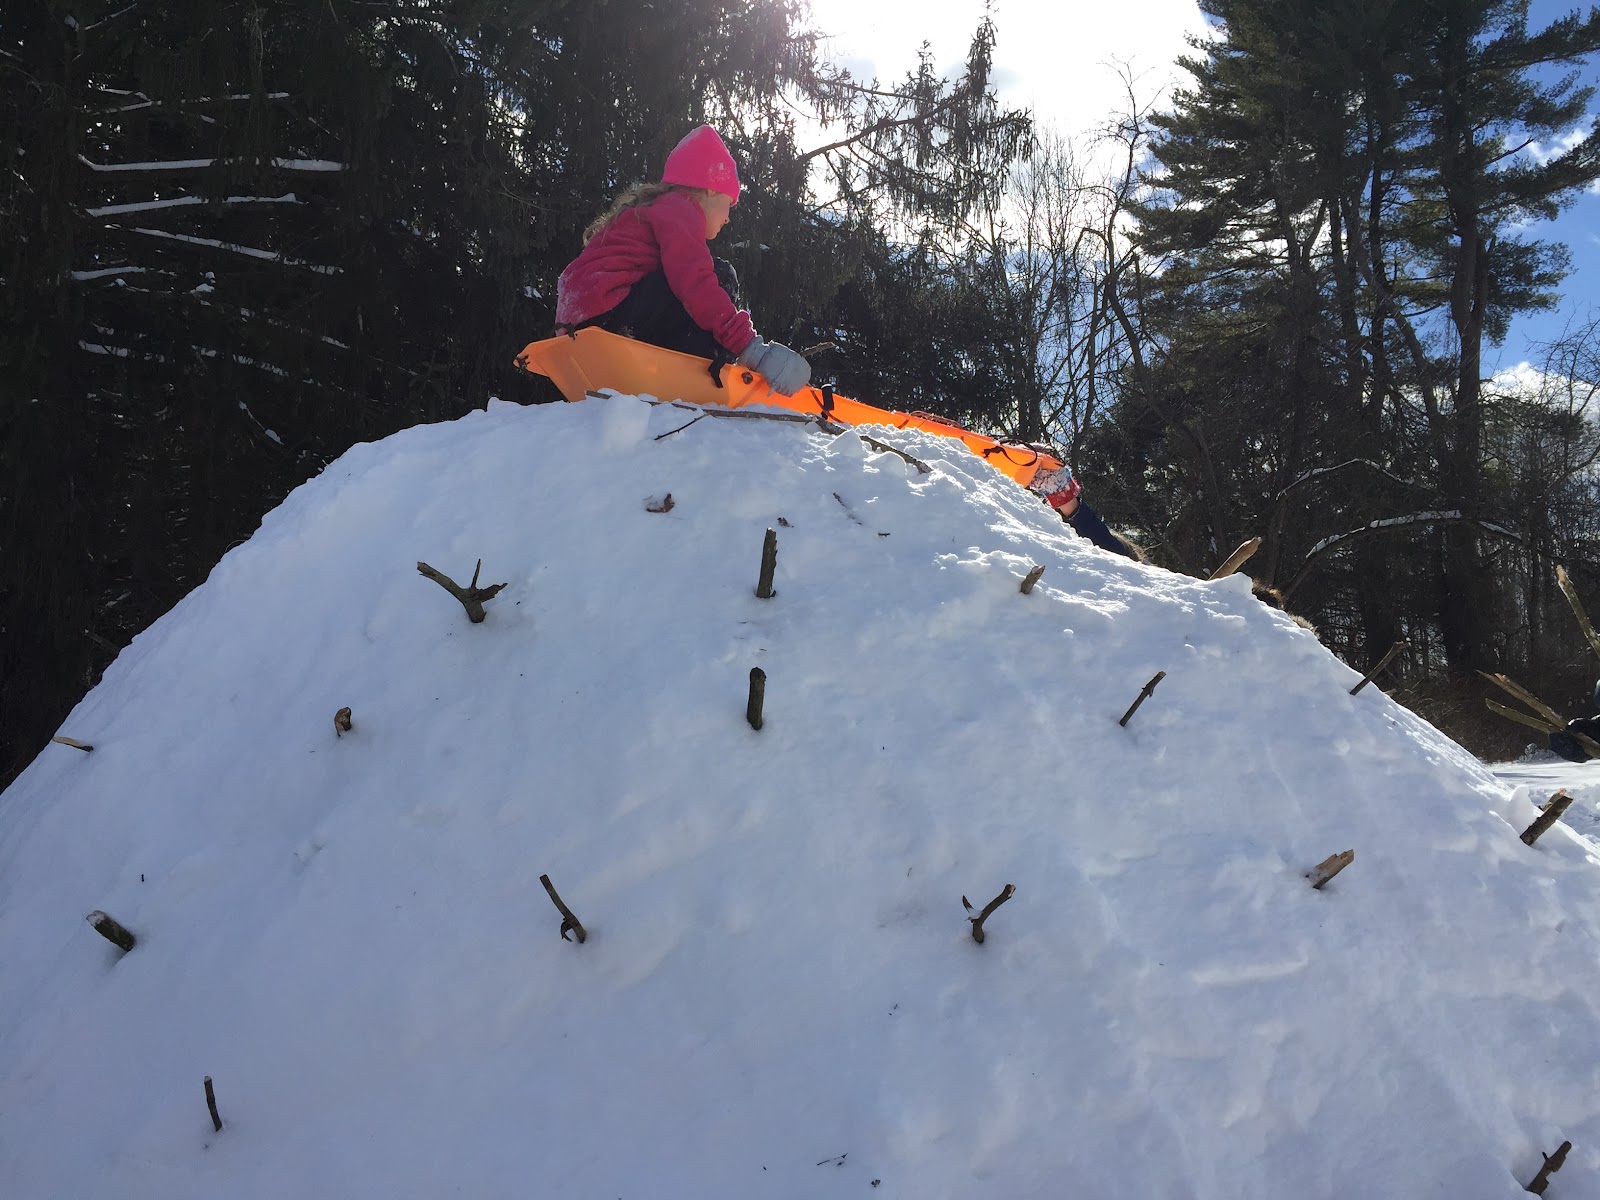
Step #4: The ‘Porcupine’ Phase

In this step of how to build a quinzee snow shelter in the woods, we are going to gather about 50 sticks that are 12 – 18 inches in length. They should all be uniform in length. This is the porcupine stage, which is to set up the quinzee for even carving on the inside. Once you have your sticks, insert them straight and fully into the quinzee along the bottom, about a foot apart, until just the tip of the stick remains sticking out. Then insert them all around the quinzee about a foot up from the first row, and continue until the entire quinzee is covered. The stick points sticking out resemble a porcupine.
The sticks give you what you need from the inside, because when you are inside carving, you continue until you hit the edge of a stick, then you don’t carve in that spot any further. Once the sticks are inserted into the quinzee, it is time to take a break before carving. You need to wait about an hour or so, depending on the temperature, to let the quinzee shelter sinter. Sintering is where the ice crystals come together with pressure, time and weight. This gives the quinzee snow shelter strength, which is very important!
Once you’ve given your quinzee some time to sinter, then you’ll move to the carving stage.
Pro Tips
- Gather about 50 sticks, uniform in length
- Sticks should be about 12 – 18 inches long
- Insert sticks about a foot apart, all over the quinzee
- Wait before carving to allow the snow shelter to sinter
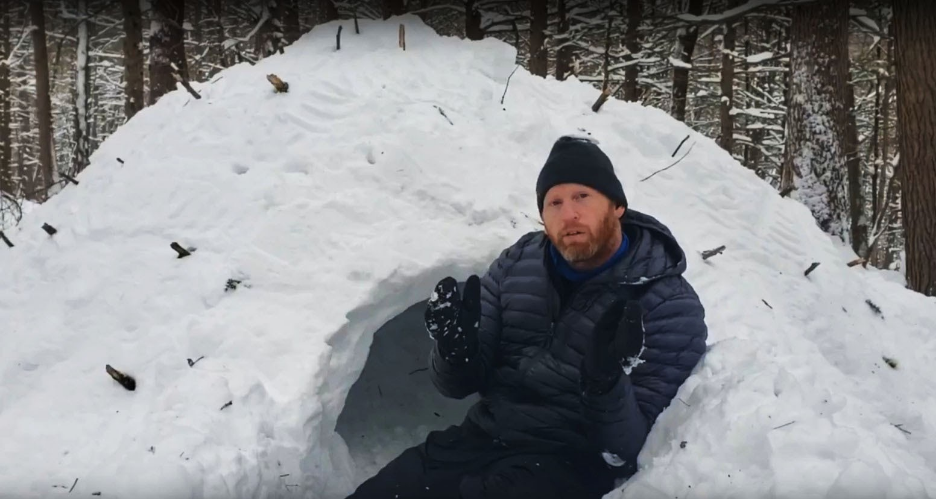
How to Build a Quinzee Hut Snow Shelter Step #5: Carving out your Interior

Lastly, you will need to carve out the inside of your quinzee snow shelter. Make sure that when you’re digging in, you also immediately start digging up until you hit the first stick, so you keep the integrity of the walls throughout the whole quinzee snow shelter. You’ll need to carve up and in, so you don’t have a lot of weight above as you carve forward, as that creates a danger of collapse.
You can dig from multiple sections or directions – if you have more than one person digging,depending on the size we have 4 opening for this big quinzee here. I have each person take a direction and meet in the middle! The breakthrough is an exciting event as well.
Download the quinzee checklist for a handy reference to all the steps !
This will make the digging portion go quicker. As you’re carving, make sure to smooth over the entire inside so there are no bumps. Any bumps or stalactites that are hanging down can melt from your body heat, drip and create ice in the bottom.
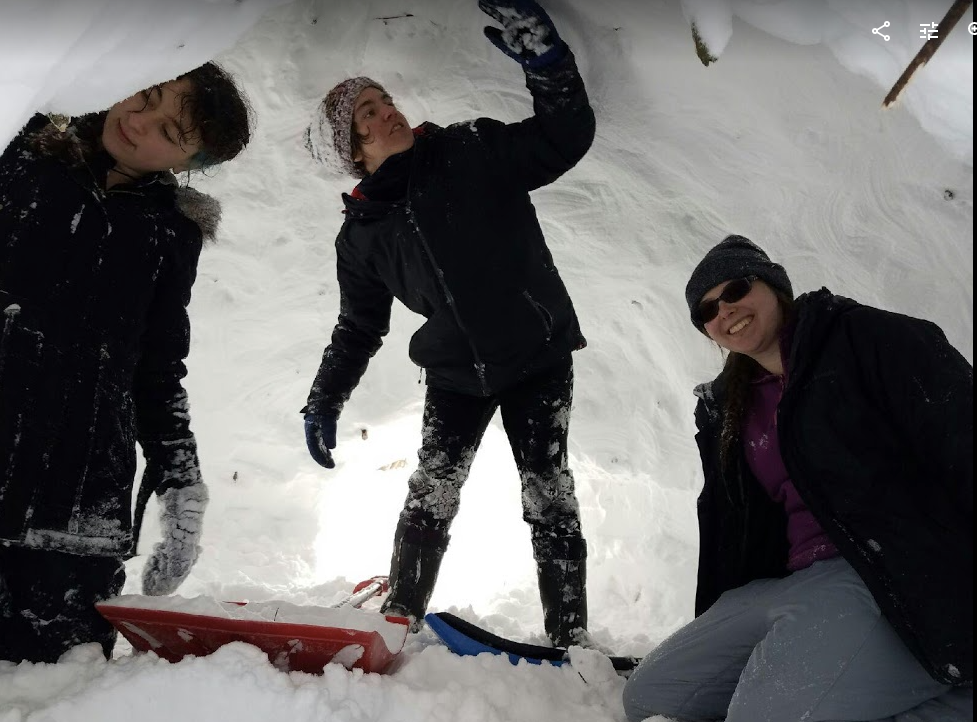
When carving, you can use small shovels, pots, snowshoes, or anything that will help you dig the snow out from the interior of your quinzee snow shelter. Once you get to your tarp-covered pile in the center – the one that you had used in the beginning and covered with the snow, you can pull the tarp up and get your backpacks or gear out of there. This eliminated a lot of other digging that you would have had to do if you didn’t use that method of putting them in ahead of time. Remember to be careful of the sticks and not go past them when digging!
Once you have dug out the inside to the point of all the sticks you placed, you’re done digging! Make sure that there is a cold sink that dips down a little more than the rest of the floor right by the door, so the cold can sink down and be in that area.
Another important stage at the end of building your quinzee snow shelter in the woods is to keep a hole or a couple small holes through the roof for oxygen exchange. If it is snowing, you want to periodically check these and keep them clear. When you are breathing, you are breathing out carbon dioxide, and you don’t want that building up in a small space like your quinzee interior.
The other thing you may like to have is a candle or a couple candles inside. Each candle gives off the equivalent heat that a person’s body would give off. If you’re inside your quinzee alone, having two candles in there with you would create the body heat of two extra people! However, candles give off carbon monoxide as waste, so again, you’ll want to be sure that you have clear holes for oxygen exchange for safety.
You can also keep the entrance open for air, but if it is windy, you’re going to want to make sure to have a number of different holes for oxygen. This is a key factor to keep in mind, as it is very important to have good oxygen exchange when you’re sleeping in a quinzee.
If you carved from a number of different directions, you can close up and block all the doors except for your main door that has the cold sink dug out. You can pile up some snow inside for a platform to sleep on across from the cold sink, too. Make sure to put something – boughs, a sleeping bag, blankets – between your body and the snow platform, so your body heat doesn’t melt it and create wetness during the night!
Pro Tips
- Remember to dig up and in to prevent collapse
- If you hit a stick when carving, stop carving in that spot
- You can dig up and in from multiple directions
- Smooth the inside so there are no bumps
- Important! Remember to create small holes for oxygen exchange!
Next Steps: Mastering Your Winter Survival Skills

So now you have the knowledge to build a quinzee snow shelter and not need a tent for any winter camping. You can build a quinzee with as little as 4 inches of snow on the ground. When the wind is whipping outside and it is super cold, you’ll find that with 1-3 people or a few candles, the temperature difference inside the quinzee snow shelter is amazing! You can be comfortable sleeping in it. It also works as a soundproof room – you could scream in there and people can’t hear you outside. This is because snow is one of the best insulators!
We encourage you to practice building a quinzee snow shelter in your own yard, so you know how to do it before you are ever in a situation where you need to do it. It’s a great activity to do with kids – they love it!
Pro Tips
You can build with as little as 4 inches of snow on the ground
Great activity to practice with kids
Snow is super insulating
A quinzee creates a soundproof room!
We have an easy to follow checklist of the steps to take to build a quinzee snow shelter, so please sign-up to receive the quinzee checklist.
Download the quinzee checklist for a handy reference to all the steps of how to build a quinzee snow shelter for winter camping!

A great article about snow and its insulating properties can be found HERE.
Here’s another great article about how to build a wilderness survival shelter here: https://willowhavenoutdoor.com/how-to-build-a-wilderness-survival-shelter/
About the Author: Wilderness Guide and Survival Instructor, Frank Grindrod, has been dedicated to teaching earth skills since founding Earthwork Programs in 1999. Some of his focuses include nature awareness, tracking, wilderness living skills and earth philosophy. He is a graduate of Greenfield Community College’s nationally-recognized Outdoor Leadership Program. Frank maintains his own education studying with respected mentors; Tom Brown, Jon Young, Paul Rezendes and others. He has been trained as a Wilderness First Responder and is a certified facilitator for the Nurtured Heart Approach.
As an Advance Trainer of the Nurtured Heart Approach, Frank has studied with national trainers including Gabrielli Lachiara, LSW., Lisa Bravo, Tom Grove and Howard Glasser, MA. He is recognized as an advanced trainer and coach with energy parenting and Howard Glasser’s, The Inner Wealth Initiative and the Children’s Success Foundation.
Frank is currently working as a professor at Smith College, a lead facilitator of wilderness education programs and the Nurtured Heart Approach, as well as consulting for camps, museums, conferences, schools and environmental education centers throughout New England.


